Recent Posts

Showing posts with label IPv4 Lab. Show all posts

Tuesday, 12 December 2017

LACP configure verifying and troubleshooting

LACP Configuration in verifying and troubleshooting

Hi !!! everyone on today we are going to learn about how configure verifying and troubleshooting in LACP. 

What do you know about LACP ?

Link Aggregation Control Protocol (LACP) is a protocol for the collective handling of multiple physical ports that can be seen as a single channel for network traffic purposes. This serves the general principle of link aggregation, which describes the effort of setting up parallel network structures to provide redundancy, or to improve performance.

This is LACP configure by preparing topology which is given below as screenshots .


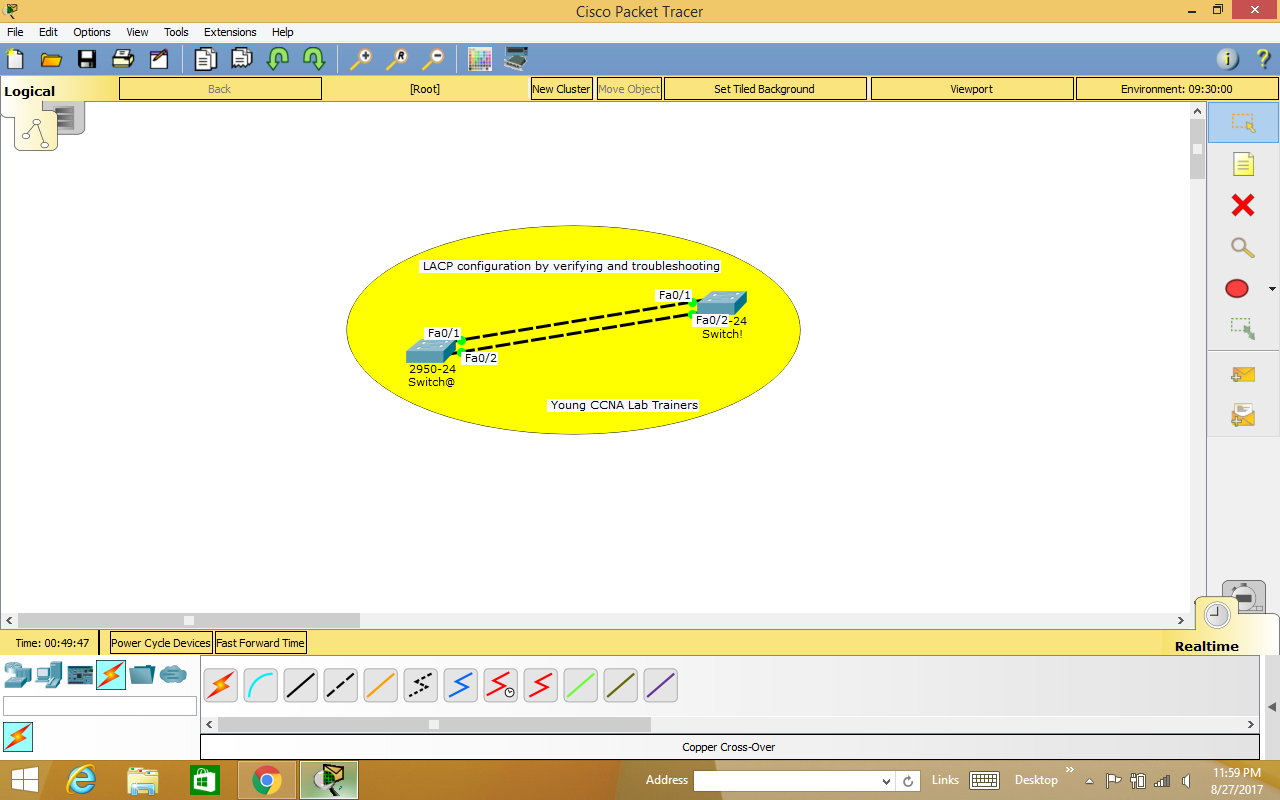
Step 1: First we have to configure LACP in Switch@


Step 2: Now we can configure LACP in Switch!


Step 3: Verifying both Switches in LACP configuration


Switch@:


After configuring in Switch@ we have to move on to switch! for checking summary.


Finally, we have completed our lab session that how to configure LACP by verifying and troubleshooting in the cisco Packet tracer version 7.0. 

Saturday, 2 September 2017

Configuration on Extended ACL

Configuration on Extended ACL (Access Control List)

Hi ! my dear people on today we are going to study about how to do configuration in extended ACL with the Cisco Packet tracer version 7.0. Which is shown in screenshots in detail explanation given in below topology as follows.

Step 1: We have to assign IP address to configure in PCs as well as Servers


Assigning IP address on PC0:


Assigning IP address on PC1:


Assigning IP address on PC2:


Assigning IP address on Server0:


Assigning IP address on Server1:


Assigning IP address on Server2:


Assigning IP address on Server3:


Configuration by assigning on Router0


Step 2: We have to Configure Extended ACL on Router0


Step 3: We should inform to Router0 with interface Ethernet0/0/0 to follow ACL rule 100


Step 4: Finally last process to verify our ACL lab and on PCs browser


Therefore, verifying our ACL lab with PC browsers by entering IP address in Servers. 


Friday, 1 September 2017

Configure Port based security using ACL

Configure Port based security using ACL

Hi ! everyone today we are going to learn about how to configure port based security using ACL. Which will be the following topology with screenshots as given below. 


Step 1: First we have to Assign IP address for the given topology shown above and we should configure with Router0


After assigning we could see below the green color symbol of light which shows that change in state to up in the Router0.


Step 2: Configure HTTP Server or Web server port 80 and FTP Server port 22 change by enable to "on" in both the server


Step 3: Configure ACL to allow port 80 and block port 22


Step 4: We can verify our lab by testing in Router0 

Router>enable
Router#show ip access-lists
Extended IP access list 100
10 permit tcp 10.0.0.0 0.255.255.255 host 192.168.0.1 eq www
20 permit tcp 10.0.0.0 0.255.255.255 host 192.168.0.1 eq 22

Therefore, We have successfully completed our lab session in configuring port based security using ACL in cisco packet tracer version 7.0.

Wednesday, 30 August 2017

Backup Route Configuration

Hi ! everyone on today we are going to learn about Backup Route on configuring both Router1 and Router2 in Packet tracer simulation. The starting procedure is that we have to do topology as shown below with the following details.


Now we should configure IP address on both PCs.


Assigning IP address on PC0


We should make sure that configuration is most important on Router0.


Similarly, after assigning Router0 move on to Router1 


Now you can see the screenshot that state of change to green color shown below:


Then we must do the verification on configuration on both Routers

Router0:

 Router1:

Thus, we can check both PCs could communicate well by these commands given below.
ping 1.0.0.2 in PC1 and tracert 1.0.0.2


Therefore, finally we have completed our lab session about how to configure backup route with the help of Packet tracer version 7.0.

Monday, 28 August 2017

Configure Router as a multiple DHCP Server

Configure Router as a multiple DHCP server

Hi !!! everyone on today we are going to learn and how to configure a router as a multiple DHCP server. Which has been mentioned below as screenshot for the following topology.

 
In this lab session we are going to see the process how did we configured DHCP server on both routers and how to configure multiple routers as already shown above as screenshot.

Configure on Router R1:


Configure on Router R2:


Now we can see the state in change to up which represent as green color shown in screenshot given below.


We can test in this troubleshooting of DHCP commands 

Router R1:


Router R2:


Finally, we have successfully completed our lab session about configuration a router as a multiple DHCP server in the cisco Packet tracer simulation version 7.0.
  

Configure Router as a DHCP client

Configuration of Router as a DHCP Client

Hi !!! everyone on today we are going see and learn about how to configure a router as a DHCP client in the given below topology.

What do you know about DHCP client ?

DHCP client is an Internet host using DHCP to obtain configuration parameters such as an IP address.
The configurable dynamic host configuration protocol client functionality allows a DHCP client to use a user-specified client identifier, class identifier, or suggested lease time when requesting an address from a DHCP server.
Configuration parameters and other control information are carried in tagged data items that are stored in the options field of the DHCP message.

Step 1: Now we can see in this lab that i have to configure Router R1 as DHCP Server 

Configuration on Router R1:


Step 2: After our configuration in R1 as DHCP server, we have to configure Router R2 as DHCP Client

Configuration on Router R2:


In the above screenshot we can look the command that R2(config-if)#ip address dhcp in which this command will automatically assign the ip address on Router R2 interface. Which is shown below as screenshot.


Note: IP address DHCP will assign ip on interface on which you will run this command and it will ask for ip from DHCP SERVER.Here in our this Lab DHCP SERVER is Router R1. But you can also configure a dedicated Machine as a DHCP Server.


Through this results shown in screenshot that we can see the change in state to up which shows as green color.

Step 3: We can check or test Router R2 interface whether it got IP address or not


Therefore, we have successfully completed our lab session on how to configure a router as a DHCP client with the help of Packet Tracer version 7.0.

Sunday, 27 August 2017

PAGP configuration to verify and troubleshoot

Configuration to verify and troubleshoot PAGP

Hi !!! everyone on today we are going to learn about how to configure in verifying and troubleshooting PAGP.

Do you know what is PAGP ?

Port Aggregation Protocol (PAgP) is a Cisco Systems proprietary networking protocol, which is used for the automated, logical aggregation of Ethernet switch ports, known as an ether channel.

The PAGP topology is given below as a screenshot by the following.


Step 1: Configure PAGP on switch S1


Step 2: We have to configure PAGP on switch S2


Step 3: Now we should verify Etherchannel port for configuration for switch S1


Step 4: After switch S1 verifying Etherchannel port lets move on for configuration in switch S2 


Therefore we have completed our lab session about PAGP configuration in verifying and troubleshooting in cisco Packet tracer version 7.0.

Popular Posts